Sorry its been a long time coming but its finally here. I’ll keep this less wordy and more picture heavy as they say a picture says a thousand words.
First up gather your materials.

Box of plants, mister with water in it, Slow release plant food. This is normal garden Osmocote its fine to use in an aquarium but not all of them are! Read the ingredients carefully and seek advice when unsure!
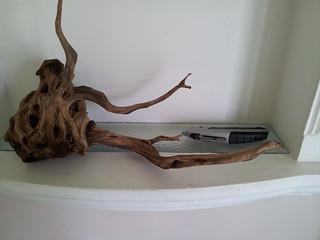
Bit of wood for usage as hardscape. You don’t have to use wood its just something I had handy.

Since I’m doing this on a budget instead of using expensive substrate I’m using normal Garden soil, John Innes No3. Others work too but again not all of them. Seek advice if you’re unsure or just use the same as me. Its cheap and you get loads more than enough for several tanks not just one.

Standard pea gravel I’ll be using as a cap for the soil now you don’t have to cap it but I recommend for your own sanity that you do. This is quite a large grain I would have used larger but that was just quickly collected from the driveway and washed out. Make sure you really wash your gravel well you have no idea what its collected on it chemical wise and if you don’t it is also covered in really fine dust which makes your tank a mess.

Some light refreshment this is surprisingly thirsty work
Step 1
Light covering of slow release fertilizer. You’ll notice the card I’ve put around the edges this is to keep the soil away from the glass as I don’t want to be able to see it, so I separate it off with the card and fill the gap with gravel so you can only see the gravel through the glass.

Step 2
Think 1cm layer of soil added on and wood positioned. The thin layer is smushed around the wood to give it some support.

Step 3
Add the rest of your soil to create your depth and height as you see fit. In this case I went high at the back left around the wood creating a plateau to plant on, and sloped it down to the right and front. This created a raised hill area at the rear and a low flat area to the right. Its very basic and you can develop it and play around as you see fit. Don’t be afraid to take a stand back at this point before you go too far and inspect. If you don’t like it tear it out and start again. After this stage it becomes harder to change your mind with your hardscape and scape if you aren’t happy!


Step 4
Carefully start adding your cap around the glass edges


Step 5
Complete your cap to a depth your happy with. Don’t make it too heavy as you don’t want to make the soil anaerobic and starve it of water/movement. In my rush in this case I made it a little too thick which bit me in the ass later on. Its very much a trial and error there’s no fixed “always make it xxx thick” its up to you and is an experience thing.


Step 6
Get your spray ready and stick your plants in!
Remember larger / taller plants at the back carpeting and low height plants at the front. Larger leaf feature plants need to either be made into features or stuck in a background / corner fillers. Read up on the rule of thirds and browse the web there’s thousands of planted tanks for you to look at to get idea’s and see how others are doing it. I dare say your first few tries will look great for about 24h and then you’ll hate it. Don’t worry this is pretty normal as you get more experienced you’ll develop a better eye for layouts and come up with more challenging planting schemes etc. Like everything it takes practice. Its also handy to read up on the plants you’re using too before hand you could be surprised with how some of them spread I got caught out with this one as the long thing leafed thing (never did ID exactly what it was) spread like mad with rooted runners took over almost the entire tank.
Remember planting takes a while and the spray is to keep your plants moist and not let them dry out during the planting process. Expect this to take a good couple of hours if you have quite a large quantity of plants, also note I haven’t gone into the whole prepping of plants before usage root/foliage trimming etc. I suggest you visit the UKAPS website linked on the right there’s much more information available to you there than I can put in a single post on here.


Step 7
Once your planting is done and you’re as happy as you’re going to be 🙂 start filling the tank. Little tip here put something in the tank and pour water onto that. Your substrate and cap won’t be settled yet if you just fill by pouring in everything will come uprooted and you’ll end up with nothing but a muddy pool.
I used a bit of cardboard you can see floating and a mug it took me about an hour to fill the 60l tank but as you’ll see its pretty clear afterwards.


Step 8
Here’s the finished thing full and with little fishies in it.


And this was about 2 months after the initial planting and fill. Desperately in need of a glass clean and massively neglected 🙂

Click through any of the images to go to the flickr gallery where you can see larger higher quality images
Hi Dave,
Can you suggest me the type of plants are suitable for beginners like me? I already have Anubias in my 60 gallons tank, but I really like plants such as java moss, whether it is easier to maintain?
Java fern is another plant that’s easy to keep as a beginner, anubias as you already know, java moss has little requirements but needs trimming to keep it in check.
Vallisneria is very easy to keep just plant and go occasionally trim it to stop it going rampant and most cryptocoryne’s are easy to keep.
I’d recommend sticking to the tropica range of plants as they usually label them by their difficulty to keep and requirements. ie: with co2 or without co2, with plant food or without.
Just remember some fish love to munch on plants, I find my plecs are very tempted by Vallis